So you grew some herbs! Yay! But now you have more basil than you’ve ever seen at one time. Great. No, really, this is actually great! Drying herbs is probably one of the easiest processes out there as well as essential to limiting waste. Continuing with basil, when you grow a basil plant it can get pretty large, especially if it’s outside. One basil plant, when maintained properly, provides more than enough to use just for cooking. Drying the leaves keeps them from going to waste. Saving your own herbs is also very cost effective. When you buy from the store, you’re paying someone else to grow it, dry it, store it and ship it to you–that cost adds up quickly. Those herbs are also considerably older than the ones from your garden. Which brings me to my next point–the herbs you grow and dry are up to 3x more potent than what is in the store! This mostly has to do with shelf life and that most store herbs are crushed. When they have been crushed most of the oils/healing properties/flavor is released and wasted. But, when you dry your fresh herbs and properly store them, all those properties and flavor are preserved longer. Okay, enough of the “why it matters” ranting and on to how!
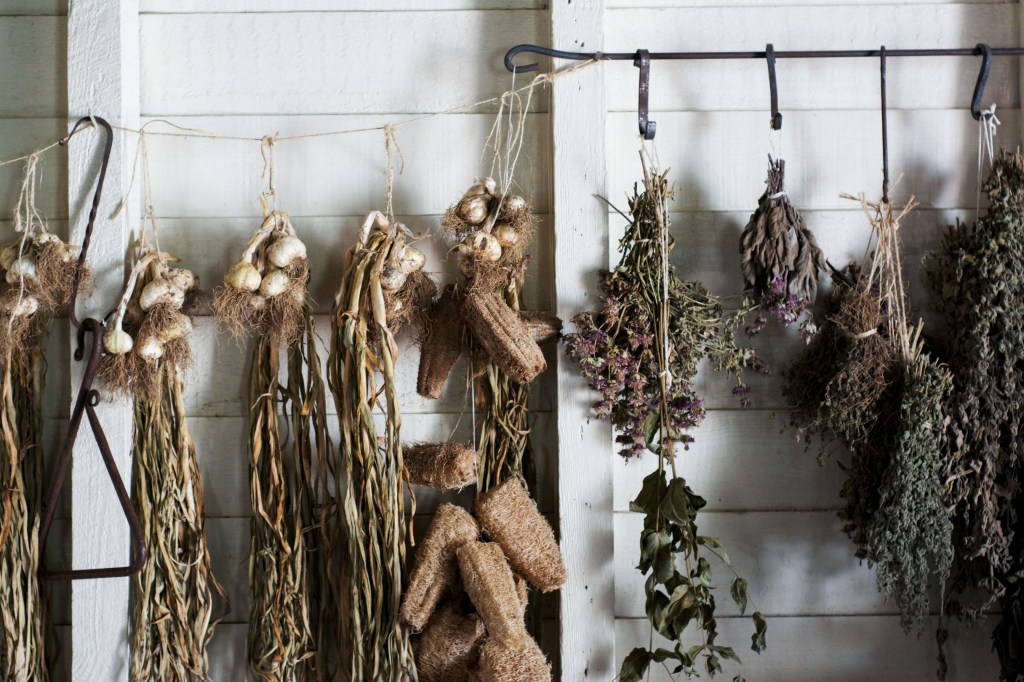
Air Drying
Air drying your herbs can look different depending on the supplies you have on hand. When I air dry my herbs I normally just hang them using string or twine, but I have seen others use screen boxes and lay the herbs on the screens. In my opinion, hanging them is more space efficient, which is very helpful if your space is limited like mine. After you’ve harvested them (best in the cool of the morning), simply gather 4-6 stems and tie them together. You want to make sure the bunch isn’t too large or they won’t have enough air flow to dry properly. Then, just hang them somewhere out of direct sunlight with low humidity. This will take a few days to a week. Leaves will dry quickly, but flowers such as chamomile will take longer. When they’re full dried they will be very fragile and crumble easily.
Dehydrating
Using a dehydrator is another great option. It’s not the cheapest option, but if you can buy one, they are the quickest option. Depending on the size of the herbs and possibly the dehydrator itself, there may be a bit of prep work. For example, chamomile–if you have harvested your flowers by the stem, you will need to gently pick the flower heads off and place them onto the tray. This shouldn’t take a large amount of time, but still something to keep in mind. Once all your herbs are on the trays, place the trays inside the dehydrator. Next you’ll need to consult your manual to set the dehydrator properly, but typically your herbs should dry in a few hours or just overnight. Again, they should be crisp and easy to crumble.
Brown Bag Drying
This method is probably the easiest; best for flowers still on their stem. All you need is a brown paper bag and simply place your herbs inside the bag. The most important thing to remember is airflow. So don’t pack the herbs and flowers tightly, leave lots of room. Next, fold the top of the bag over and set/hang the bag in an area that is cool, dry and away from direct sunlight. Though the drying process is great in a pinch for time and is great for keeping dust/dirt/bugs off the herbs, it will take a similar length as air drying; possibly a bit longer.
Storing
Storing dried herbs is fairly simple, there are just a few important rules to ensure freshness.
– Try not to crumble or break the dried herbs. This locks in the healing properties and flavors.
– Store in an airtight container with a seal, preferably glass. Mason jars are a great option you may already have on hand.
– Keep them in a cool, dry area away from the sun. Sunlight and humidity are two things that will spoil your herbs quicker than you think!
There are so many ways to preserve your herbs, but these are by far my favorite! I love how simple (and cheap!) they are to do. Are there any methods you prefer? Any methods you’re curious about that I haven’t talked about? Let me know in the comments! As always, feel free to email me any questions.
Cheers, my friend, until next time.
Erin

Leave a comment